
How to create a glass logo effect in Photoshop?
Here's a quick way to create some nice looking translucent glass type that'll work great on any background, made completely with layer styles.

Step 1:
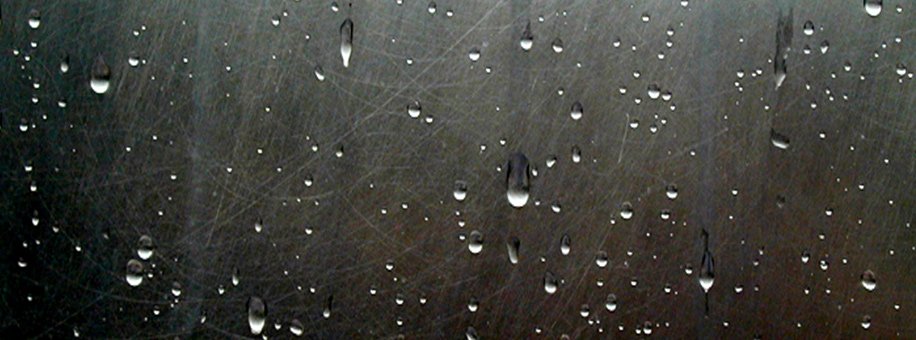
First, get your background ready. We'll use a great wet metal texture (Google for it).
Step 2:
The next step is adjusting Lightness and adding a blue gradient.
Select the texture layer and press Ctrl+U on the keyboard to open the Hue/Saturation setting window.
Set the following parameters:
Hue: 202; Saturation: 68; Lightness: +10;

Step 3:
Type a text you want and choose its font – we used Franklin Gothic Heavy because bold type is the best for this effect. The size to be used in about 300 pt and the color you choose for the text will not influence the outcome.

Step 4:
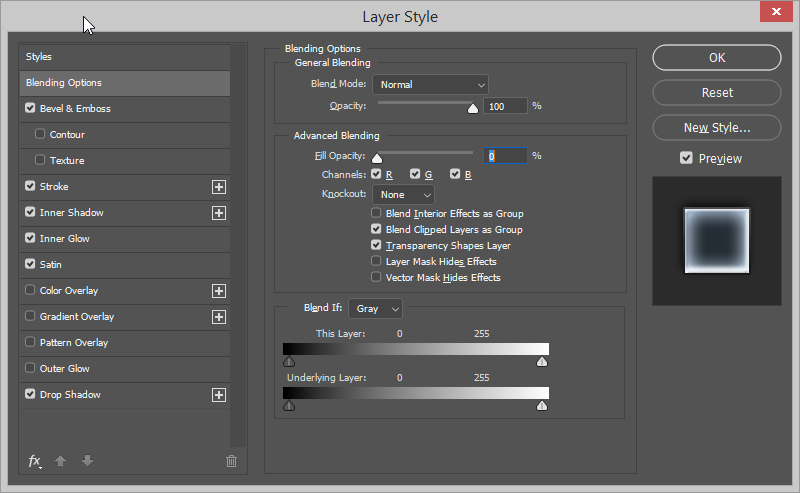
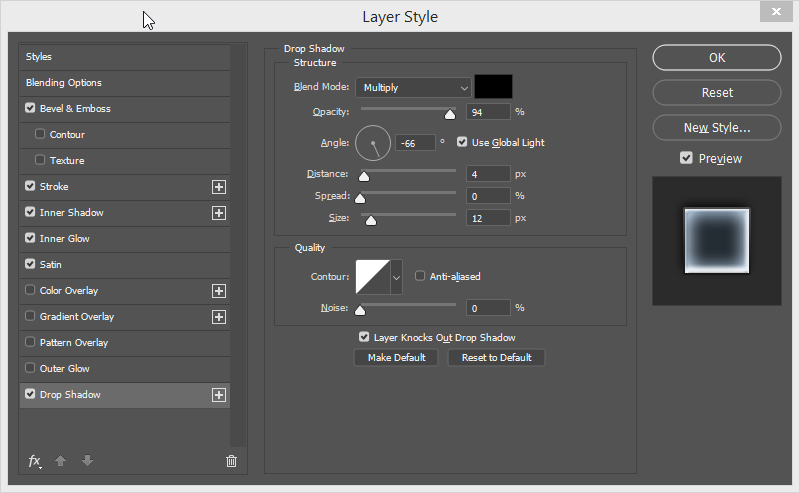
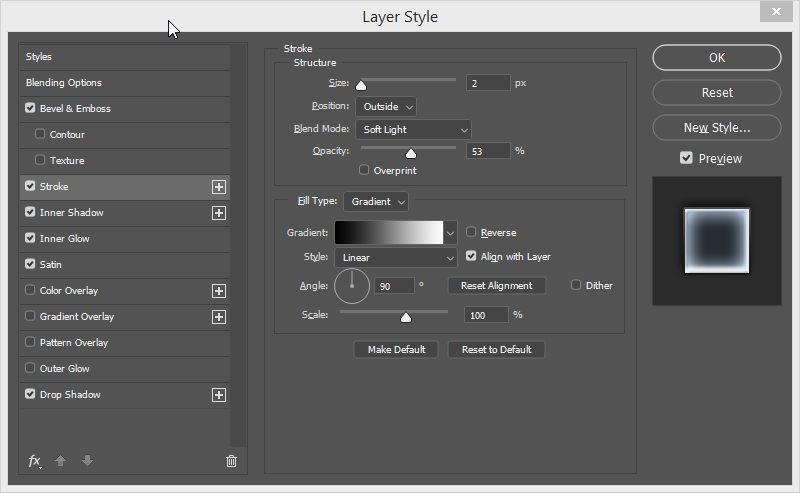
Next comes adding layer styles to the text. At the bottom of the Layers palette click on the Add a layer Style option and choose Drop Shadow. We will also use Inner Shadow, Inner Glow, Bevel and Emboss, Satin and Stroke options from the same list. Choose values from the image below for each layer style to get the glass effect.
Keep in mind that the Advanced Blending option, Fill Opacity value should be 0%. This will make the color of your text transparent.
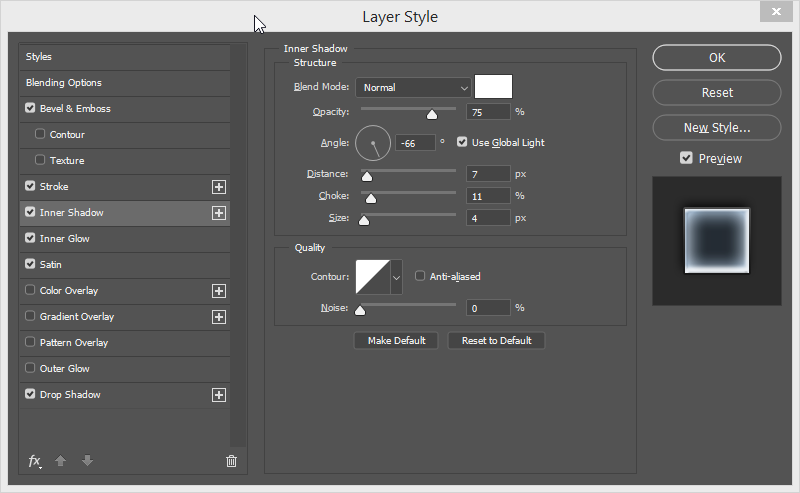
When you select the Inner Shadow style, you need to select white (#ffffff).
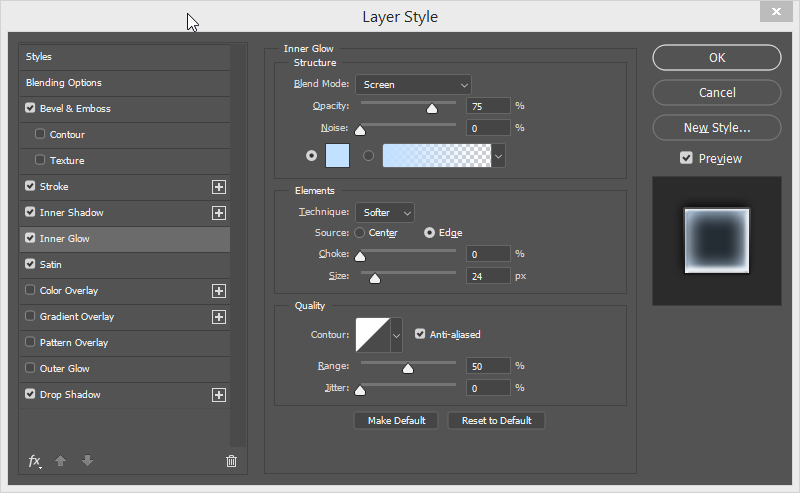
In the Inner Glow option, select #bee0ff color code.
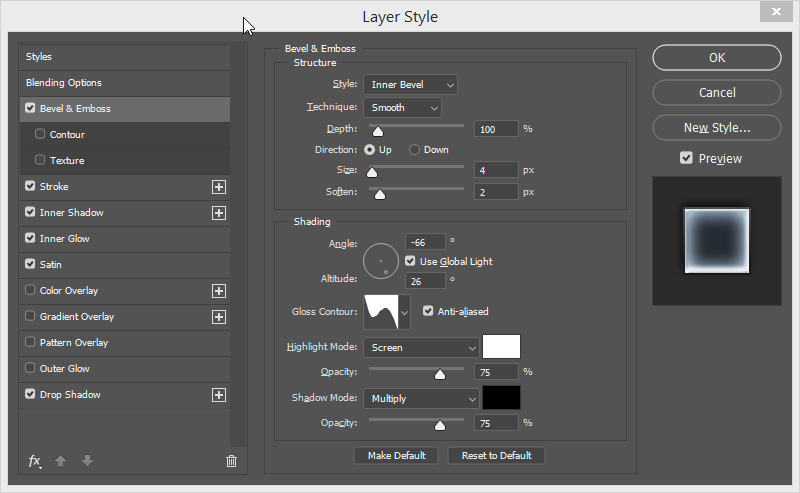
When you select Bevel and Emboss layer style, the value of the Gloss Contour field should be
Rolling Slope – Descending.
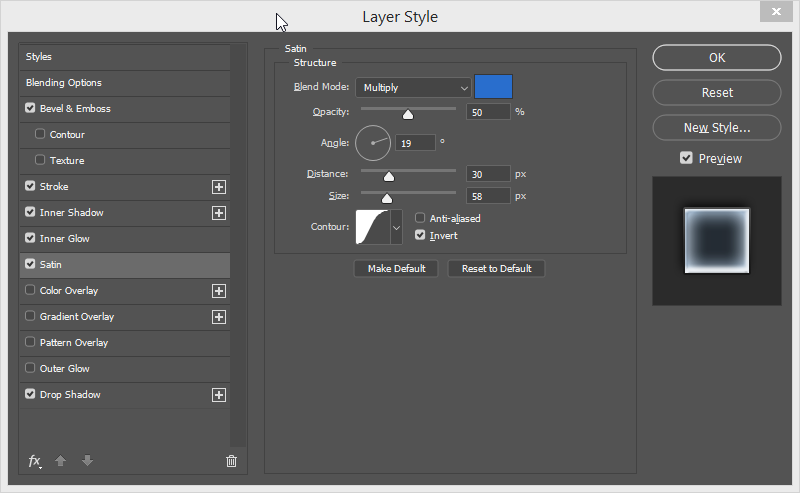
When you select the Satin style, the color code should be set to #006fce.
We remind you that all Layer Styles values in the images above should be identical.
So there you have it – our simple Glass Effect tutorial is over and you can now create amazing graphics in Photoshop.
